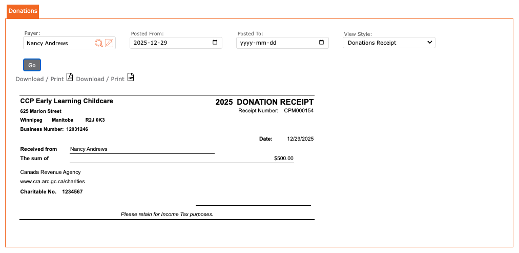
The user can now generate a donation receipt for charitable donations through the reports left menu item.
To access:
- Reports > Accounting > Receipting > Donations
To print or save:
- Click the PDF icon
View Style: Donations Receipt
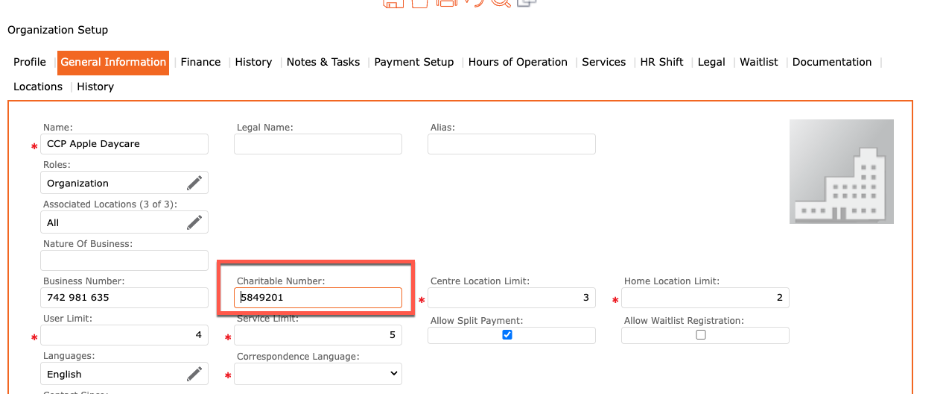
Organization Setup – Charitable Number
Description: The user can now add a Charitable Number to the Organization Setup. This MUST be set up to generate a Donation Receipt.
To add a charitable number:
- Go to the left menu > Setup > Organization > General Information
- Charitable Number = Enter the Organization Charitable Registered Number
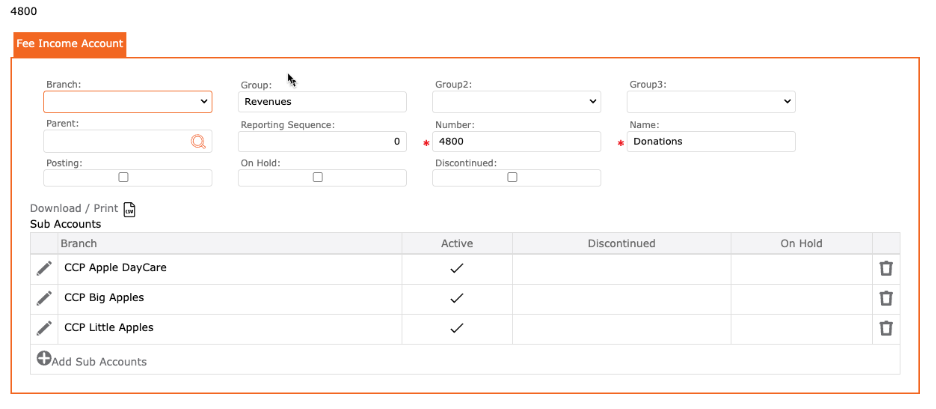
Setup > GL Account for Donations
Description: The user can now add a GL Account for Donations. This must be set up to generate a Donation Receipt
- Go to Setup > Accounting > Fee Income > Create a new Fee Income Account
- Enter the Account Number
- Enter the Account Name (example: Donations)
- Click SAVE
- Then, de-select the Posting checkmark
- Add the sub accounts
- Click the checkmark to apply
- Click the SAVE icon to save all
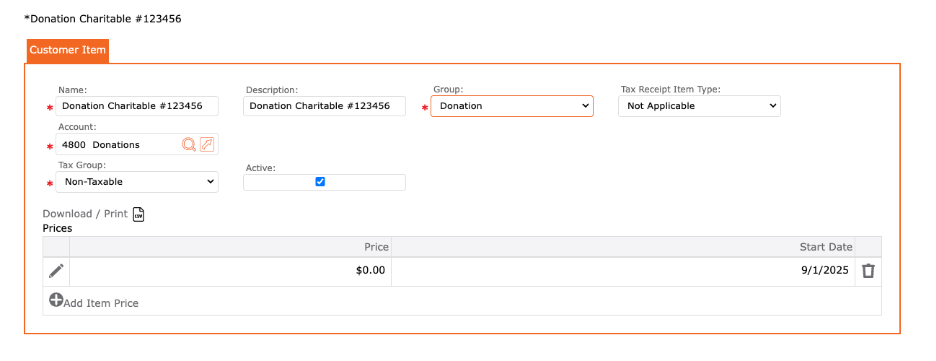
Setup > Item for Donations
Description: The user can now add an item for Donations. This must be set up to generate a Donation Receipt
- Go to setup > Accounting > Fee Item
- Click Create New
- Name = Donations
- Description = Donations + Organization Charitable Number
- Group = Donation (IMPORTANT for proper receipting)
- Tax Receipt Item = Not Applicable
- Account = Associate to the Donation GL Account
- Tax Group = Non-Taxable
- Active = YES
- Prices:
- Click the “+ Add Item Price”
- Price = $0.00 or any amount (this can be overridden when creating a manual invoice/ payment)
- Start Date = When does this price take into effect
- End Date = Applicable end date, or 9999
- Click the checkmark to apply
- Click the SAVE icon to save all
Processing a donation in CCP MAX
Description: To process a donation in CCP MAX, the user must first invoice the payer and then apply a payment to this invoice.
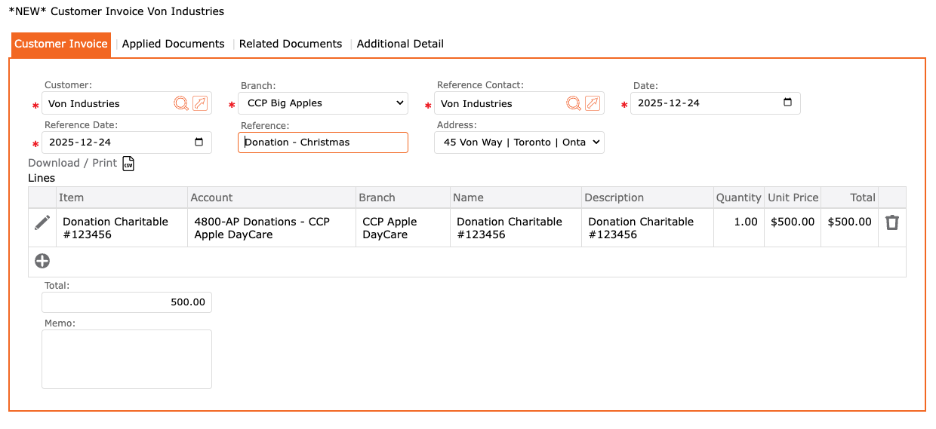
Step 1: Create a manual invoice
- Go to Accounts Receivable > Billing > Manual Invoice
- Customer = Payer
- Branch = Associated Branch to the Payer
- Reference Contact = Payer
- Date = Date received
- Reference Date = Reference Date
- Reference = Note that will display on the statement
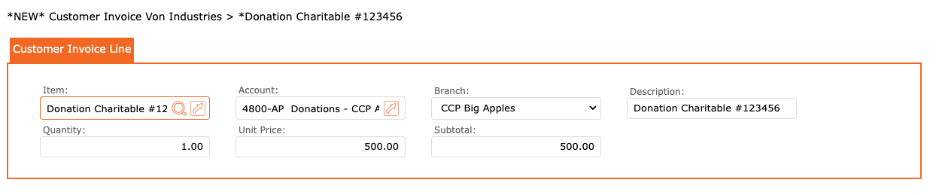
- Lines > Click the “+” icon
- Item = Donation Item
- Account = Associated Account
- Branch = Associated Branch
- Description = Donation’s description (will auto populate once you enter the item)
- Quantity = Can override
- Unit Price = Can override to match the donation amount
- Click the checkmark to apply
- Click the POST icon to complete the manual invoice
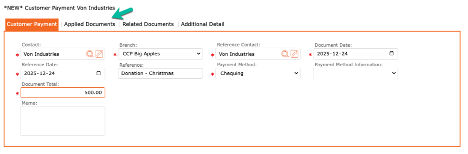
Step 2: Create a Manual Payment received from the payer
- Accounts Receivable > Payments > Manual Payment
- Contact = Payer
- Branch = Associated Branch
- Reference Contact = Payer
- Document Date = Date payment received
- Reference Date = Reference Date
- Reference = Note that will display on statement
- Payment Method = select
- Document Total = Total funds received
- Memo = internal note
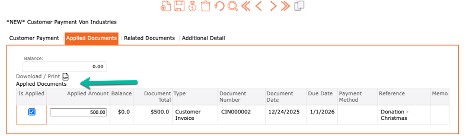
- NEXT, you MUST apply the payment to the manual invoice that was created for this donation.
- In the manual payment, click on the tab “Applied Documents”
- Select the invoice that applies,
- Review
- Click POST to complete the process.
IMPORTANT: If you do not apply the payment in the applied documents tab, you will not be able to create a Donation Receipt.
Step 3: Process the Donation Receipt
- Go to Reports > Accounting > Receipting > Donations
- Enter the Name of the Payer
- Enter the Posted from Date (optional)Enter the Posted to Date (optional)
- Select the view style = Donations Receipt
- Click GO
- To print:
- Click the “Download/ Print PDF” icon
- To save to device:
- Click the “Download/ Print PDF” icon
- Save as PDF
- Click the “Download/ Print PDF” icon
