In order to Setup Subsidy, the user must setup the Rates for Subsidy using the Accounting > Customer Item (Rates). See “How to View/ Edit or Add a Customer Item.
Depending on the province or municipality where your organization is located, the user may deal with more than one Subsidy Provider (Municipality or other designated Government Organization).
In order to provide accurate reporting for funding, the user has the option to set up more than one Subsidy Provider. This will allow the organization to setup different rates within each of these jurisdictions.
Depending on where the organization’s centres are located, the users could set up different subsidy providers for each location. A subsidy approval is stored on the child Payer ’s file. The Payers’ subsidy approval can then be allocated to a specific subsidy provider at a specific location.
How to Add a Subsidy Provider
In this section the user will learn how to add a Subsidy Provider
1. Setup > Subsidy Providers
2. Click “+” Add Subsidy Providers
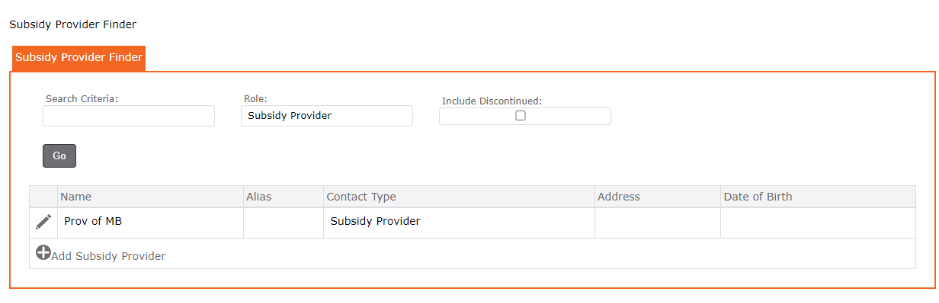
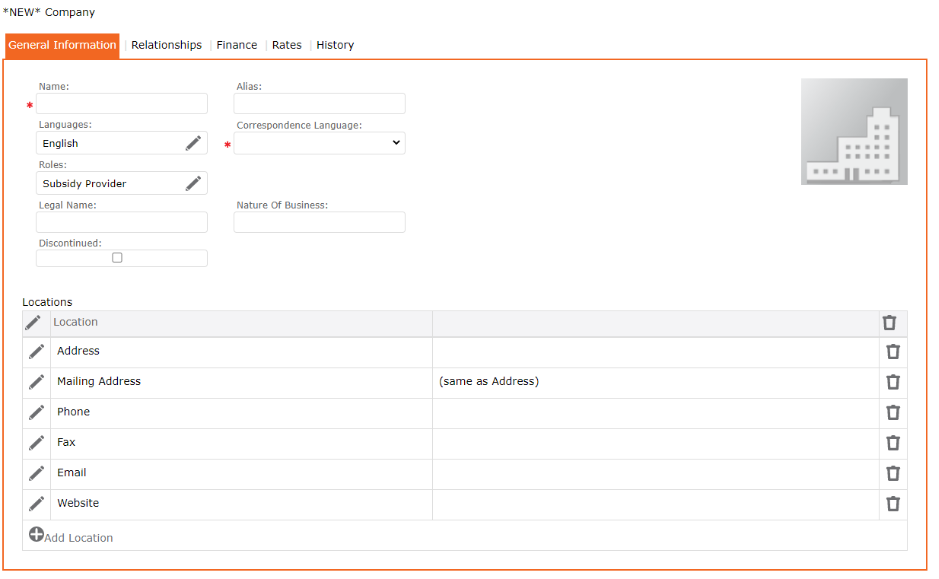
3. Complete the form including Name, Alias, Language, Legal Name and Nature of business
4. From the Grid, click the Edit pencil icon to Edit any of the fields on the form
5. Click the SAVE icon to Save all
6. Subsidy Provider appears in the Grid
To Add Subsidy Rates
The user will now add the Care Code and the Services associated to each type. This will include choosing the service, the Billing type and the Billing rate.
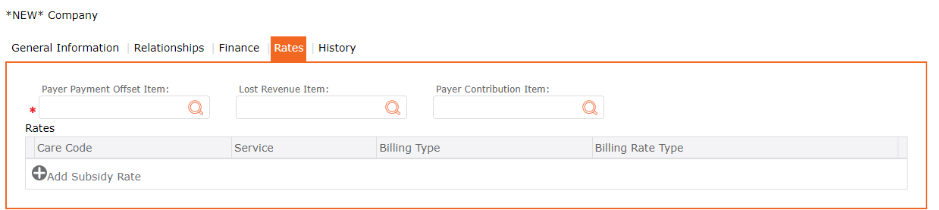
Payer Payment Offset Item Payer
Allows the organization to track lost revenue when Parent fees are higher than Subsidy fees and cannot be charged back to the parent.
Payer Contribution Item Payer
Allows the organization to track Payer contribution fees separate from full parent fees.
Lost Revenue Item
Should the municipality or governing body not allow the organization to charge full fees to subsidized family, the Lost Revenue Item will track all of the lost revenues when generating invoices to parents and subsidy.
Care Codes
When a Payer is approved for subsidy, the approval form displays the name of the child, the period it covers and the services to be rendered for the child. The approval includes Care Code, Services, Approved Rate, Payer Contribution, Number of approved days, Number of allowable absent days, and the approval period (Start & End date).
Although not all jurisdictions use “Care Code”, this field allows the user to identify the type of service approved.
Service
As all services are set up at the organization level, the Service drop-down list facilitates the description of the Care Code. As the services all have a price associated to them, this creates standard pricing throughout the application.

Billing Type: Drop-down list – choose best option – Pre-Schedule, Adjustment, Post-Attendance or Post Schedule
Billing Rate Type: Drop-down list – choose best option – One time, Daily, Monthly, Hourly, etc.
How to Setup Subsidy Approval for a Contact – Payer
Subsidy approvals are stored on a Contact’s Payer file. The user will set up the subsidy approval and enter in the description and the name of the child the subsidy is for. Subsidy approval has a start and end date, allowable absent days, minimum, maximum parent contribution, approval rate, etc.
How to Add Subsidy Approval for a Payer
To apply a subsidy approval under a Payer’s account:
1. Left Menu > Contact
2. Contact Finder > enter name of contact
3. Click the GO to display the name
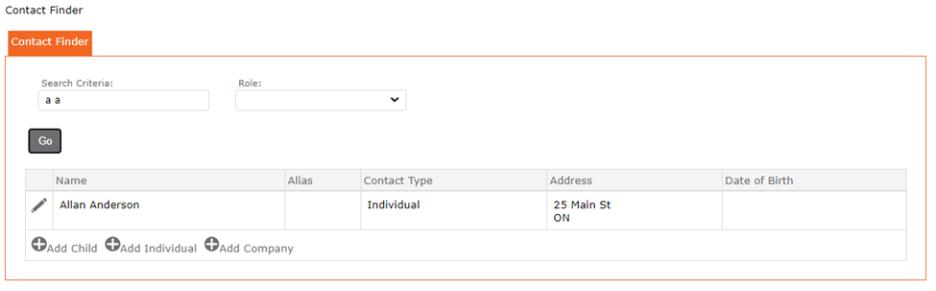
4. Click the edit pencil icon to the left of the name to open the contact’s account
5. Click the Subsidies tab
6. Click Pencil to edit provider
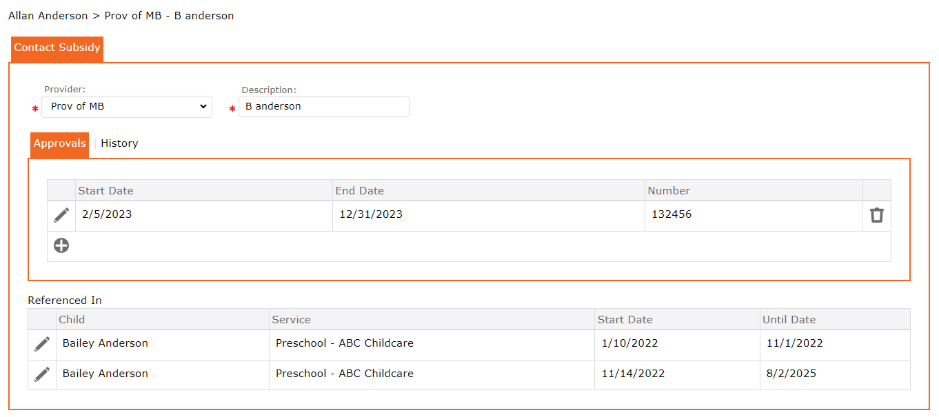
7. On the Contact Subsidy form, in the field Provider – Select from the from the drop-down the subsidy provider (if there are no options in the drop-down list, these must be set up in the Left Menu > Setup > Lists > Subsidy Provider)
8. In the Description – enter the full name of the child approved for subsidy
9. In the Approvals tab – Click the “+” Add Subsidy Approval
10. Complete the Subsidy Approval form
11. Click the SAVE icon to Save to return to the previous screen
NEXT: Reference the service to this new subsidy approval
a. click the “+” Subsidy Apply to Service
b. Select the child’s childcare service that has the subsidy approval.

12. Complete all changes by clicking the SAVE icon on the contact’s main screen
Adding a 2nd Subsidy Approval
Subsidy Approvals are time sensitive. It has a start and end date. For this reason, more than one approval form can be set up for the same Payer, for the same child.
To set up a 2nd Subsidy Approval, repeat steps 3 to 11 above.