In order to Setup Subsidy, the user must setup the Rates for Subsidy using the Accounting > Customer Item (Rates).
Depending on the province or municipality where your organization is located, the user may deal with more than one Subsidy Provider (Municipality or other designated Government Organization).
In order to provide accurate reporting for funding, the user has the option to set up more than one Subsidy Provider. This will allow the organization to setup different rates within each of these jurisdictions.
Depending on where the organization’s centres are located, the users could set up different subsidy providers for each location. A subsidy approval is stored on the child Payer ’s file. The Payers’ subsidy approval can then be allocated to a specific subsidy provider at a specific location.
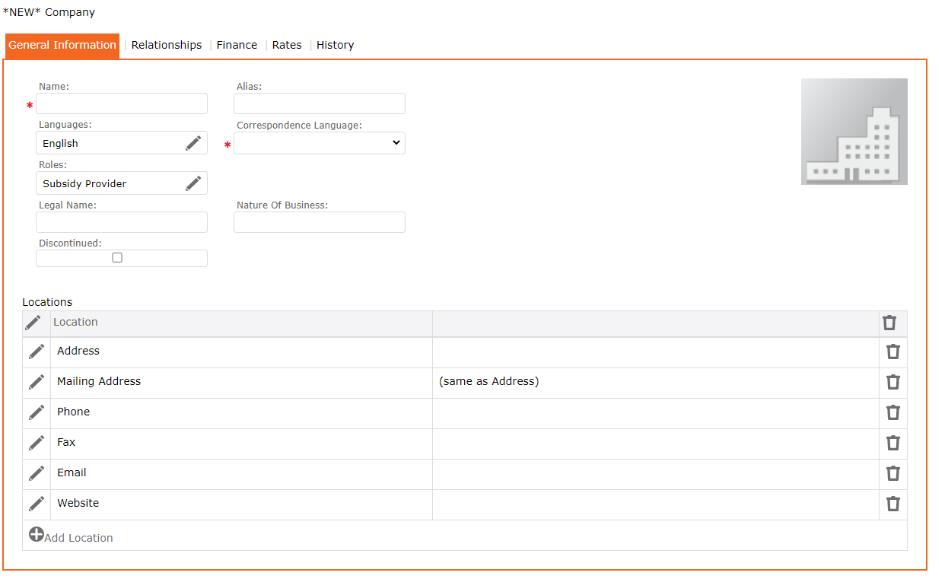
Add a Subsidy Provider
In this section the user will learn how to add a Subsidy Provider
1. Setup > Subsidy Providers
2. Click the “+” Add Subsidy Providers
3. Complete the form including Name, Alias, Language, Legal Name and Nature of business
4. From the Grid, click the edit pencil icon Edit any of the fields on the form
5. Click the SAVE icon to Save on the Maintenance Toolbar
6. Subsidy Provider appears in the Grid
Add Subsidy Rates
The user will now add the Care Code and the Services associated to each type. This will include choosing the service, the Billing type and the Billing rate.
Go to the Rates tab
- Setup > Subsidy Provider
- Select the Subsidy
- Click on the Rates tab
- Enter the Payer Payment Offset Item, Lost Revenue Item, Payer Contribution Item
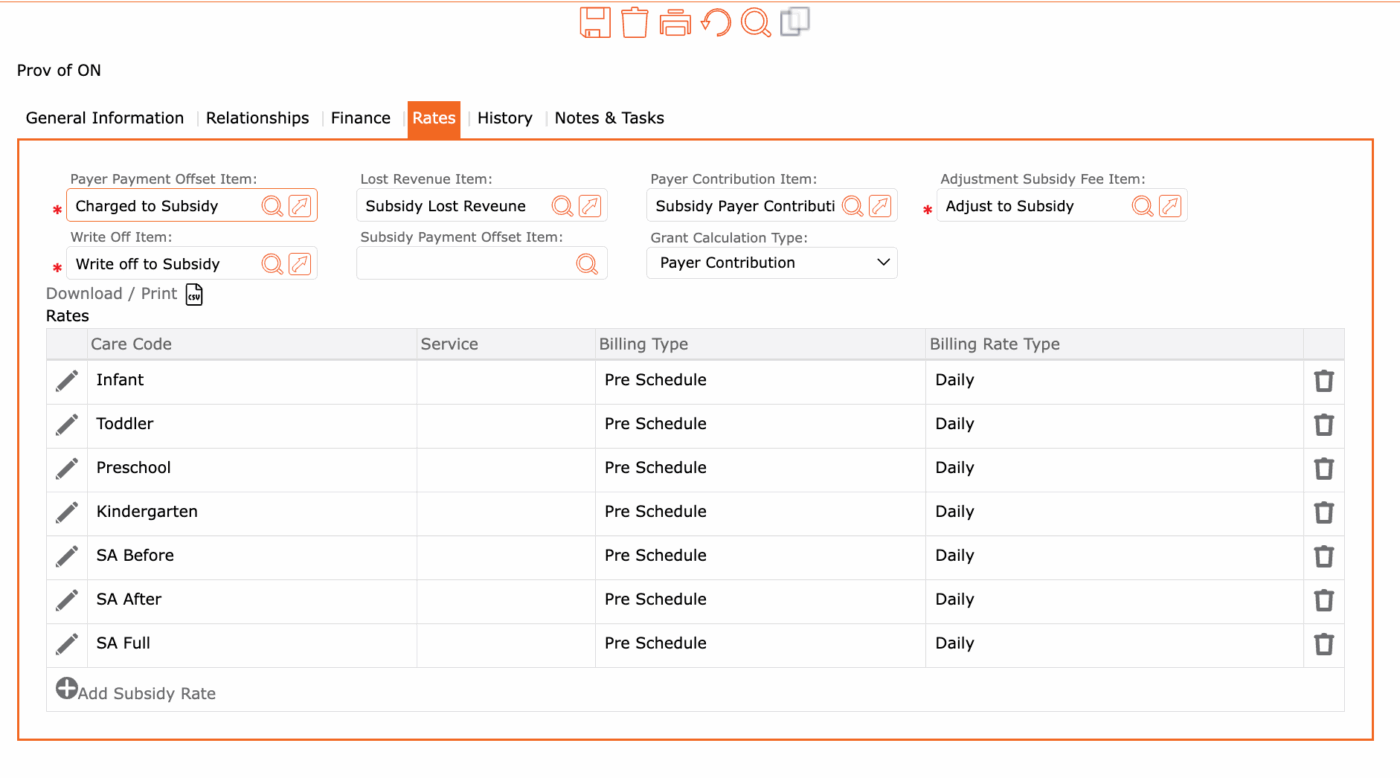
Payer Payment Offset Item = This removes the subsidy amount off the parent’s invoice.
Lost Revenue Item = This records any lost revenue when your public fee and subsidy fees are not the same.
Payer Contribution = This records any payer contribution in its own account.
Adjustment Subsidy Fee Item = When you select Adjust subsidy in the payment reconciliation it will record the adjustment here.
Write Off Item = When you select Adjust Entry in the payment reconciliation it will record the adjustment here.
Subsidy Payment Offset Item = This removes the Grant amount off the Subsidy invoice.
Care Codes
When a Payer is approved for subsidy, the approval form displays the name of the child, the period it covers and the services to be rendered for the child. The approval includes Care Code, Services, Approved Rate, Payer Contribution, Number of approved days, Number of allowable absent days, and the approval period (Start & End date).
Although not all jurisdictions use “Care Code”, this field allows the user to identify the type of service approved.
Under the Rates table:
- click the “+” Add Subsidy Rate
- Enter the Care Code
- Service can leave blank
- Enter the Billing Type
- Enter the Billing Rate Type
- Click the checkmark to apply and return to previous screen
- Click the SAVE icon to save all updates
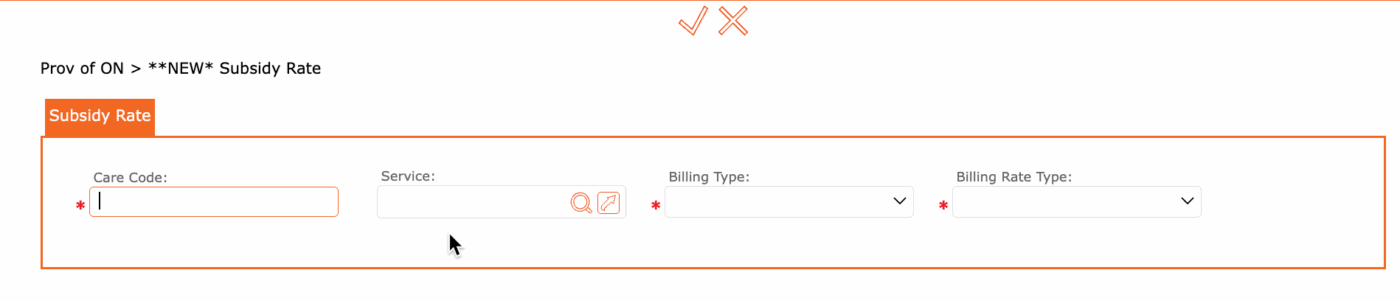
Billing Type: Drop-down list – choose best option – Pre-Schedule, Adjustment, Post-Attendance or Post Schedule
Billing Rate Type: Drop-down list – choose best option – One time, Daily, Monthly, Hourly, etc.
Additional information:
Lost Revenue = Subsidy Lost Revenue (only use if the subsidy rates are lower than the childcare rates and your organization cannot charge the parent the difference) otherwise this account stays blank.