Locations Tab
A Location can be a Centre, a Home, or a place where Events are delivered. As an organization the user may deliver services at more than one location. In the previous lessons, the user has set up all its standard lists, services, rates, subsidy provider and accounting. The next step is to set up the locations, homes and events location and choose what is available at each location. Other information the user will need to add to the Location profile will be the areas (physical space – i.e., classroom), the unique services offered at each location. Once the setup of each location is complete, the next step will be to enroll children at these locations.
Similar to setting up the organization, each location will inherit the setup from the organization. Should additional information be required at each location, the user will be to add these additional services.
Note: It is better to set up at the organization level and pick from the list what is available at this location. Should modification be done at the location, these will not be part of the global changes as they are unique to this location.
The Add Childcare Centre location, or Add Childcare Home location button, will only display if you have not reached your maximum contractual limit. If you need to add either of the above, please contact solutions@childcarepro.ca for assistance.
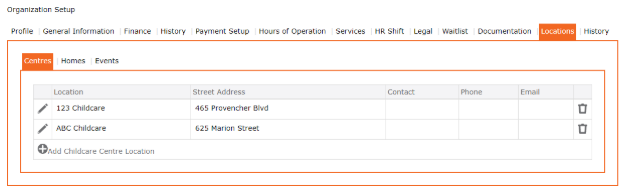
Adding a Location
1. Setup > Organization > Locations
2. Click “+” Add Location
3. Location Description – Type the Name of this Location
4. Click the “edit pencil” to Edit Address, complete the form
5. Click the “checkmark” icon to Save the changes
6. Click the “edit pencil” to Edit Mailing Address
7. Click the “checkmark” icon to Save the changes
8. Click “+” Add Phone/Fax
9. Click the “checkmark” icon to Save the changes
10. If adding more than one Phone/Fax, repeat steps 8 & 9 for all Phone/Fax numbers
11. Click “+” Add Email
12. Click the “checkmark” icon to Save the changes
13. To add more than one Email, repeat steps 11 & 12 for all email addresses
14. Click “+” Add Website
15. Click the “checkmark” icon to Save the changes
16. To add more than one Website, repeat steps 14 & 15 for all the website addresses
17. Click the “checkmark” icon to Save to return to the Main Form
18. Click the “SAVE” icon to Save the new Location